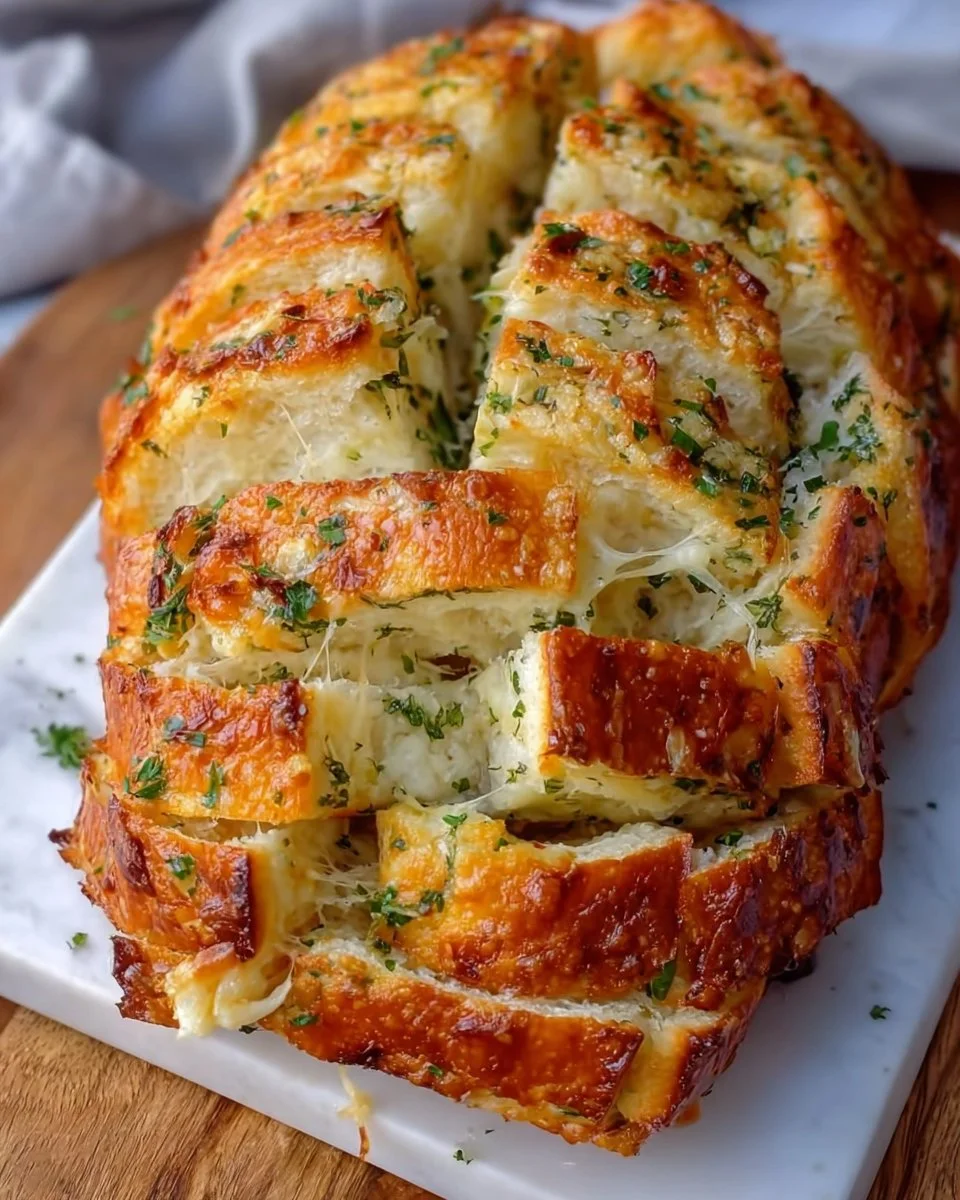
The aroma of freshly baked bread drifts through your home, wrapping you in a warm embrace as each warm, doughy ball of delight awaits your eager fingers. Sourdough Discard Pull-Apart Garlic Bread invites both the savory allure of garlic and the nutty, complex notes of sourdough into a loaf that perfectly straddles tradition and innovation. Your heart flutters with excitement at the thought of pulling apart those golden, crisp pieces, each oozing with melted cheese and entwined with buttery, garlic goodness, leaving just a hint of herby brightness from fresh parsley.
As you sink your teeth into it, the outer layer offers a satisfying crunch that gives way to a soft, pillowy center—an orchestra of textures harmonizing in perfect unison. The comforting taste, rich in buttery flavor and punctuated by garlicky warmth, sings of cozy gatherings and leisurely evenings. This bread isn’t just food; it’s an invitation for connection and a celebration of simple pleasures.
Why You’ll Love This Sourdough Discard Pull-Apart Garlic Bread
Imagine a dish that transforms your sourdough starter discard into something extraordinary! This pull-apart garlic bread captures the essence of hearty comfort food while also acting as a sustainable and thoughtful culinary choice. Not only does it feature the brilliant tang of your homemade sourdough, but it also layers indulgent flavors with gooey cheese and rich butter that make every bite an experience.
Perfect for any occasion, this bread is ideal as an appetizer for family gatherings, a star player at a potluck, or simply an indulgent side for your weeknight dinners. Picture serving it alongside a steaming bowl of marinara or as the perfect complement to your favorite Italian dishes. Each pull unleashes a symphony of flavors and textures, making it hard to resist going back for more!
Preparation Phase & Tools to Use
Before diving into this culinary adventure, gather your tools, as each plays a pivotal role in ensuring your garlic bread turns out to be a showstopper.
- Mixing Bowl: A large bowl is essential for bringing your ingredients together to form the dough.
- Measuring Cups and Spoons: Precision matters in baking. Using the right measurements leads to the perfect texture and flavor.
- Rolling Pin: Not mandatory, but it helps achieve an even size for your dough balls.
- Bundt Pan: This unique shape creates delightful layers that are easy to pull apart and serve.
- Oven: Preheating to the right temperature ensures that your garlic bread bakes evenly, creating that lovely golden crust.
Practical Preparation Tips
- Ensure your sourdough starter is fed and bubbly for the best flavor.
- Set out your butter to soften a bit before you need it; it makes the dough easier to work with.
Ingredients for Sourdough Discard Pull-Apart Garlic Bread
Gather the following ingredients to create a masterpiece:
- 2 cups sourdough starter (discard): Adds necessary hydration and flavor.
- 3 cups all-purpose flour: Forms the structure of the bread.
- 1 tsp salt: Elevates the flavor and balances sweetness.
- 1 tsp sugar: A touch of sweetness to enhance the sourdough.
- 2 tsp garlic powder: Infuses the bread with that irresistible garlic flavor.
- 1/2 cup unsalted butter, melted: Provides richness and aids in browning.
- 1/4 cup chopped fresh parsley: Brightens and freshens the overall taste.
- 1/2 cup shredded mozzarella cheese: Melts beautifully, adding gooey goodness.
- 1/4 cup grated Parmesan cheese: Imparts a tangy flavor and crunchy texture.
Feel free to experiment with these ingredients! You may substitute fresh garlic for garlic powder, or use herbs like thyme or rosemary to create your own unique blend.
How to Make Sourdough Discard Pull-Apart Garlic Bread
- In a large mixing bowl, combine the sourdough starter, all-purpose flour, salt, sugar, and garlic powder. Stir until a dough forms, feeling the textures meld together beneath your fingertips.
- Knead the dough on a floured surface for about 5-7 minutes, until it becomes smooth and elastic. Don’t rush; enjoy the tactile sensation.
- Place the kneaded dough into a greased bowl, cover it with a damp cloth, and let it rise for about 1 hour or until doubled in size. Patience pays off here!
- Preheat the oven to 375°F (190°C), filling the air with anticipation of what’s to come.
- Once risen, punch down the dough and divide it into small balls, approximately 1 inch in diameter. This is where your excitement begins to bubble up!
- Dip each dough ball into melted butter, ensuring each one is luxuriously coated, before placing them into a greased bundt pan. Layer these spheres together with charm, arranging them artfully.
- Sprinkle shredded mozzarella and Parmesan cheese between the layers, teasing your taste buds with the promise of cheesiness.
- Once all the dough balls are nested together, sprinkle with chopped parsley and drizzle any remaining melted butter over the top for an extra golden touch.
- Bake for 30-35 minutes until golden brown and fragrant. The kitchen will transform into an aromatic haven, capturing the essence of comfort food.
- Let cool for a few moments before serving—this is perhaps the hardest part! When ready, pull apart the pieces and enjoy!
Chef’s Notes & Helpful Tips
- Make-Ahead Tips: Prepare your dough the night before and refrigerate it overnight. Just let it come to room temperature before proceeding with baking.
- Cooking Alternatives: If you prefer, you can use an air fryer to get that crispy exterior. Just reduce the cooking time and keep an eye on it!
- Customization Ideas: Add cooked and crumbled bacon for extra savoriness or experiment with different cheeses like fontina or cheddar for varying flavors.
Common Mistakes to Avoid
- Over-kneading the dough: While a good knead is essential, excessive kneading can result in a dense texture. Keep it light and fluffy!
- Not allowing enough time to rise: Rushing this crucial step may lead to a denser bread; allow the dough to rise until it doubles in size.
- Using cold ingredients: Always use room temperature butter and warm sourdough starter to ensure proper mixing and rise.
What to Serve With Sourdough Discard Pull-Apart Garlic Bread
Elevate your meal experience by pairing this irresistible garlic bread with:
- Spaghetti and Marinara Sauce: The perfect match to soak up extra sauce with glorious ease.
- Caesar Salad: Crisp greens and a creamy dressing appeal to the palate, balancing richer flavors.
- Homemade Tomato Soup: Dipping golden chunks of bread into luscious, warm soup satisfies the soul.
- Grilled Chicken or Steak: The garlic infusion complements savory meats wonderfully.
- Olive Tapenade: A vibrant spread that harmonizes beautifully with the buttery bread.
- Baked Parmesan Zucchini Fries: Light and crunchy, they make for a delightful contrast in flavors and textures.
Storage & Reheating Instructions
- Fridge: Store any leftovers in an airtight container for up to three days.
- Freezer: For longer storage, wrap the leftovers tightly in plastic wrap and aluminum foil. They can last for up to three months. Just thaw at room temperature before reheating.
- Reheating Methods: Pop slices in the oven at 350°F (175°C) for about 10 minutes until warmed through, or use the microwave for about 20-30 seconds.
Estimated Nutrition Information
Approximate values per serving (1 pull-apart piece):
- Calories: 155
- Protein: 3g
- Carbohydrates: 20g
- Fat: 7g
- Fiber: 1g
(Note: Values may vary based on ingredient brands and preparation methods.)
FAQs
1. Can I use all-purpose flour instead of bread flour?
Absolutely! All-purpose flour works well here. Bread flour adds more protein and creates a chewier texture, but the result will still be lovely with all-purpose.
2. How should I store my sourdough starter?
Keep your sourdough starter in the fridge if you’re not using it daily. Feed it every week to maintain its health.
3. Can I add different herbs or spices?
Yes! Feel free to get creative. Rosemary, thyme, or even red pepper flakes can work wonders, giving your bread a unique twist.
4. What can I do with leftover garlic bread?
Reimagine it! Use it for garlic bread croutons in salads, or turn it into a decadent sandwich using your favorite filling.
5. How can I tell when my dough has risen enough?
It should approximately double in size and feel puffy to the touch. Gently pressing it with your finger should leave a slight indentation that doesn’t spring back.
Conclusion
Sourdough Discard Pull-Apart Garlic Bread might just become your next go-to recipe! It embodies not only the joy of cooking but also the simple delights of sharing it with loved ones. As you savor those stretchy cheese bites and aromatic garlic flavors, you’ll find that every reminder of time spent in the kitchen has been worth it. So don’t wait—gather your ingredients, unleash your inner baker, and create something truly scrumptious. The world of flavor awaits you!
Print
Sourdough Discard Pull-Apart Garlic Bread
- Prep Time: 15 minutes
- Cook Time: 35 minutes
- Total Time: 50 minutes
- Yield: 12 servings 1x
- Category: Appetizer
- Method: Baking
- Cuisine: Italian
- Diet: Vegetarian
Description
A delightful garlic bread made from sourdough starter discard, featuring layers of gooey cheese and flavorful garlic.
Ingredients
- 2 cups sourdough starter (discard)
- 3 cups all-purpose flour
- 1 tsp salt
- 1 tsp sugar
- 2 tsp garlic powder
- 1/2 cup unsalted butter, melted
- 1/4 cup chopped fresh parsley
- 1/2 cup shredded mozzarella cheese
- 1/4 cup grated Parmesan cheese
Instructions
- Combine sourdough starter, all-purpose flour, salt, sugar, and garlic powder in a large mixing bowl.
- Knead the dough on a floured surface for about 5-7 minutes until smooth and elastic.
- Place the kneaded dough in a greased bowl, cover it with a damp cloth, and let it rise for about 60 minutes.
- Preheat the oven to 375°F (190°C).
- Punch down the risen dough and divide it into small balls, approximately 1 inch in diameter.
- Dip each dough ball in melted butter before placing them in a greased bundt pan.
- Sprinkle mozzarella and Parmesan cheese between layers of dough balls.
- Top with chopped parsley and drizzle any remaining melted butter over the top.
- Bake for 30-35 minutes until golden brown.
- Let cool before serving and enjoy!
Notes
For variations, consider adding fresh garlic, different herbs, or crumbled bacon for extra flavor.
Nutrition
- Serving Size: 1 piece
- Calories: 155
- Sugar: 1g
- Sodium: 300mg
- Fat: 7g
- Saturated Fat: 4g
- Unsaturated Fat: 2g
- Trans Fat: 0g
- Carbohydrates: 20g
- Fiber: 1g
- Protein: 3g
- Cholesterol: 30mg