
The warm, inviting aroma of freshly baked bread wafts through the air, wrapping you in a comforting embrace. As you slice into the golden crust, the knife glides effortlessly, revealing the soft, chewy crumb inside, dotted with tangy pockets that burst with flavor. Each bite is a celebration—a dance of textures and tastes that tell the story of a time-honored baking tradition. But before that heavenly loaf graces your table, a humble mixture of flour and water transforms into a living, breathing sourdough starter, the heart of artisan bread-making.
Creating your own sourdough starter opens the door to endless culinary possibilities. You cultivate not just yeast and bacteria, but also a deeper connection to your food. The rhythmic ritual of feeding your starter each day becomes a soothing part of your routine, much like tending to a beloved garden. Watch as it bubbles and grows, each alchemical transformation a testament to your patience and dedication, leading you closer to the first bite of that luscious bread. With each loaf baked, you’ll not only nourish your body but also your spirit, savoring the fruits of your labor and the stories that unfold in your kitchen.
Why You’ll Love This Sourdough Starter
This sourdough starter isn’t just a culinary project; it’s a gateway to wholesome, flavorful bread that elevates even the simplest meal. Baking with a homemade starter means you harness the power of wild yeast and lactic acid bacteria, creating an unmistakable tang that enhances the complexity of your bread. Each loaf rises to delightful heights, boasting a crust that crackles with a satisfying crunch, while the interior remains light and airy, inviting you to take another bite.
Moreover, the possibilities are endless! Use your starter not only for traditional loaves, but explore the realms of sourdough pancakes, waffles, or even pizza dough. This starter transforms everyday meals into extraordinary experiences, perfect for family gatherings, brunches, or cozy evenings at home. The taste stands out—rustic yet refined, effortlessly capturing the essence of artisanal baking. You’ll find joy and pride in every loaf you create, sharing the love with friends and family as they revel in the deliciousness.
Preparation Phase & Tools to Use
Before diving into the magic of sourdough, gather your essential tools to ensure a smooth and successful experience. Each instrument plays a vital role in your starter’s journey toward fermentation.
- Clean glass jar: A transparent vessel lets you observe the bubbling activity and growth of your starter, offering a sense of fulfillment as you witness its life cycle.
- Spatula or spoon: For mixing the ingredients, choose a non-metal utensil to avoid any unwanted reactions.
- Kitchen scale: Precision is the key to success in sourdough; accurate measurements prevent any adverse effects on fermentation.
- Cloth or loose lid: Cover your jar loosely to facilitate airflow. This helps wild yeast from the environment join your starter while keeping contaminants at bay.
Practical tips enhance your preparation: ensure your tools are impeccably clean to prevent unwanted bacteria from interfering with the fermentation process. Create a warm, draft-free spot in your kitchen where your starter can thrive, away from moisture and temperature fluctuations.
Ingredients for Sourdough Starter
The beauty of this age-old recipe lies in its simplicity. You will need just two ingredients: flour and water.
- Flour: Opt for unbleached all-purpose or whole wheat flour. Whole wheat flour packs more nutrition and wild yeast, which can speed up the fermentation process. If you’re looking for gluten-free options, almond flour or a gluten-free flour blend could work, but anticipate adjustments in consistency and fermentation time.
- Water: Use filtered or bottled water to avoid any chlorine or additives that might hinder yeast activity. Aim for room temperature water because it jumpstarts fermentation.
These humble ingredients, treated with care and attention, become the foundation of your sourdough starter—a living culture that breathes flavor into your bread.
How to Make Sourdough Starter
- In a clean glass jar, combine equal parts of flour and water. Start with 100g of each.
- Stir energetically until no dry lumps remain; the mixture should achieve a thick, pasty consistency.
- Cover the jar loosely with a cloth or lid, allowing air to circulate while keeping out dust and contaminants.
- Set it aside in a warm area of your kitchen for 24 hours.
- Each day, feed your starter with equal parts flour and water, stirring well to incorporate the ingredients. This daily ritual nurtures the yeast.
- After several days, observe as bubbles form and a distinct sour aroma begins to develop, indicating successful fermentation.
- When your starter doubles in size, full of bubbles and radiating a pleasant, tangy smell, it is ready to use for baking delicious bread.
As you embark on this delightful journey, consider saving your old jar to demonstrate the transformation. Watch as your starter comes alive—this joy fuels the wholesome experience of sourdough baking.
Chef’s Notes & Helpful Tips
-
Make-ahead tips: Consider starting your sourdough starter about a week before you plan to bake. This timeframe allows enough time for fermentation, ensuring you go into baking with a robust culture.
-
Cooking alternatives: If you’re experimenting with other methods, remember that a sourdough starter works beautifully in a bread machine or can be incorporated into traditional oven baking. You may even explore recipes that utilize the air fryer for quick, guilt-free snacks.
-
Customization ideas: The flavor profile of your bread can shift significantly based on the flour used; try experimenting with rye flour or spelt for a deeper taste. You can also tweak the hydration levels—add more water for a softer, wetter dough, or less for a firmer crumb.
Common Mistakes to Avoid
Embarking on your sourdough journey can come with pitfalls. Here are mistakes to sidestep and how to handle them:
- Using chlorinated water: This disrupts yeast activity. Always opt for filtered water.
- Neglecting to feed your starter: Ensure daily feeds to keep the yeast thriving. A neglected starter might develop a hooch, or liquid layer, which indicates it is hungry.
- Inconsistent temperatures: Sourdough starters thrive in stable environments. Avoid placing them near drafts or direct sunlight that could harm fermentation.
Awareness of these common pitfalls helps you navigate the ups and downs of sourdough baking with confidence.
What to Serve With Sourdough Starter
Once your lovely sourdough starter is in full swing, the world of baked goods opens up beautifully. Here are pairing ideas to consider:
- Classic sourdough bread: Pair your artisan loaf with creamy butter and flaky sea salt for a divine appetizer.
- Sourdough pancakes: Golden and fluffy, these pancakes burst with rich flavor, topped with fresh berries and maple syrup for a brunch to remember.
- Sourdough pizza: Create a crunchy, slightly chewy crust with your starter, ready for a canvas of your favorite toppings.
- Sourdough croutons: Bake leftover starter into crispy croutons, perfect for topping salads or soup.
- Sourdough focaccia: Infuse flavors with herbs and olives for a chewy, flavorful bread, perfect for serving with dips.
- Sourdough bagels: Transform your starter into chewy bagels, boiled to perfection and topped with sesame or poppy seeds.
- Sourdough waffles: Crunchy and fluffy waffles make for a decadent breakfast or brunch option drenched in syrup.
Embrace your sourdough starter and explore the delightful dishes that emerge from it!
Storage & Reheating Instructions
Maintaining your sourdough starter is vital to keeping it alive and thriving. You can store it in two ways:
- Refrigerator: For those who bake less frequently, store your starter in the refrigerator. Feed it once a week, bringing it back to room temperature before the next use. Remove from the fridge, feed, and let it sit out for 1-2 hours to reactivate before baking.
- Freezer: If you plan to take a break from baking for an extended period, transfer a small portion of your starter into an airtight container or freezer-safe bag. Thaw it in the fridge before bringing it back to life with a few feeds.
For reheating baked goods made from your starter, simply warm them in the oven at low heat, allowing the crust to regain its crispness and the interior to become soft once again.
Estimated Nutrition Information
While the exact nutritional values can vary, here’s an approximate nutritional breakdown per serving of sourdough bread made with this starter:
- Calories: 100
- Protein: 3g
- Fat: 1g
- Carbohydrates: 20g
- Fiber: 1g
Keep in mind that individual ingredients can influence these values, and the above is a general estimate.
FAQs
1. How do I know if my starter is ready to bake?
Your starter is ready when it has doubled in size consistently within a few hours after feeding, has a pleasant sour aroma, and produces bubbles throughout.
2. Why is my sourdough starter not bubbling?
If you don’t see bubbling, your starter might be too cold, or it may need more frequent feedings. Additionally, make sure you’re using quality flour and water.
3. Can I use whole wheat flour instead of all-purpose flour?
Absolutely! Whole wheat flour is ideal for sourdough starters as it contains more nutrients, allowing your starter to develop a stronger flavor more quickly.
4. How long will my starter last?
With proper care and weekly feedings, your sourdough starter can live indefinitely. Many bakers pass down their starters through generations, each with its unique character.
5. What should I do if my starter develops an unusual smell?
A healthy starter should smell tangy and slightly sour. If it develops a strong, unpleasant odor or shows signs of mold, it’s best to discard it and start anew.
Conclusion
The journey of creating a sourdough starter invites you into the world of baking with open arms, where delightful aromas and satisfying textures await. Each phase of building your starter brings you closer to mastering the art of sourdough, offering the satisfaction of crafting something deliciously nourishing, one batch at a time. Embrace the process, enjoy the delightful complexity it adds to your meals, and savor every whip of the whisk. Whether you bake for yourself or to share with loved ones, the experience will fill your home with warmth and joy. Start today, and let your culinary adventure flourish!
Print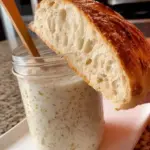
Sourdough Starter
- Prep Time: 10 minutes
- Cook Time: 7 days
- Total Time: 7 days and 10 minutes
- Yield: 1 sourdough starter 1x
- Category: Bread
- Method: Fermentation
- Cuisine: Artisan
- Diet: Vegetarian
Description
Create your own sourdough starter with just flour and water; a gateway to artisanal baking.
Ingredients
- 100g unbleached all-purpose flour
- 100g filtered room temperature water
Instructions
- Combine equal parts of flour and water in a clean glass jar.
- Stir energetically until no dry lumps remain.
- Cover the jar loosely with a cloth or lid.
- Set it aside in a warm area of your kitchen for 24 hours.
- Feed your starter daily with equal parts flour and water, stirring well.
- Observe as bubbles form and a sour aroma develops over the days.
- When it doubles in size and has a pleasant smell, it’s ready to use.
Notes
Use filtered water to prevent chlorine from affecting yeast activity. A clean environment is essential for success.
Nutrition
- Serving Size: 1 tablespoon starter for baking
- Calories: 100
- Sugar: 0g
- Sodium: 0mg
- Fat: 1g
- Saturated Fat: 0g
- Unsaturated Fat: 1g
- Trans Fat: 0g
- Carbohydrates: 20g
- Fiber: 1g
- Protein: 3g
- Cholesterol: 0mg